top of page


Watertight Hatches and Bulkheads
We subdivided the boat into five watertight compartments and added watertight hatches. Each watertight compartment has the capability to provide enough buoyancy to keep the vessel afloat if all the others were flooded. The hatches were originally sliding-type. We found that the sliding hatches were not able to keep the extreme weather out. We once had a sliding hatch blow open during a sudden ferocious williwaw in Devilfish Bay in Southeast Alaska. We installed two quick-acting hatches that are rated to seal a 29 foot column of water on top.
Deck Work
Various projects were completed on deck. This includes, but is not limited to, the following projects:
-
New cleats around the deck.
-
Fixed position heavy-duty railings.
-
Increased bowsprit spreader width, bowsprit step added, and bowsprit handles
-
Revised bowsprit socket.
-
Deck Crane with radar/navigation lights, and radio antennas.
-
New helm position binnacle.
-
General two speed deck winch 62.5 : 1.
-
Dorade vents.
-
Chimney.
-
Chimney protection bars.
-
Fire suppression hose.
-
Handholds.
-
Solar panel array.
-
Anchor line reels.
-
Perimeter floodlights.
-
Windvane/spare rudder.


Bowsprit Widened and Handles Installed
The bowsprit spreader was widened by six inches on either side. A step was added when you get on the other side of the rail. We still need to make a net under the bowsprit.

We hand spliced all of our rigging using a marlinespike and other tools that we made. We used a vise to hold the wire while we spliced. The wire was treated with boiled linseed oil and the eye was leathered. I made some splicing cheat-sheets for any future projects.

Handspliced Standing Rigging


Wire Feeding Tools
These are tools (left photo) we made for feeding wire through watertight deck seals. You can push the sharp tube into the rubber seal, feed electrical wire through the center of the tool, then withdraw the tool to leave only the wire through the seal. Every place a wire passes through a bulkhead or the deck, one of the fittings at the right is used. This (right photo) is a Scanstrut Deck Seal.
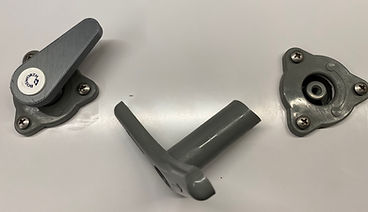
Custom Knobs
We 3D printed a new valve handle (on left) to replace the too long valve handle (center).

Custom Thru-Hull Fitting
Custom Hose discharge through hull for above the waterline. We do not have any though-hulls below the waterline except for the propeller shaft.


New Propeller
New Propeller. We increased both the pitch and diameter to load the engine more.


A good friend gifted us a self-tailing winch with a 62.5:1 mechanical advantage. We made the base and installed it as a general purpose winch.
New General Winch


Rain Collector/ Sun Shield
Solar Panel Roof


We fabricated a roof to hold a solar array. This array is 640 watts. The roof doubles as a rain collection area and as protection from sun and rain when steering outside. It is designed to fold-down to the cabin top by removing two bolts. This also protects our heads from the swinging boom of the mainsail.

Before we had bottom paint, we scraped the hull to remove the growth. It usually took about two hours (in cold Alaska water). This was necessary about every 4-6 months in low-light arctic water.
Scraping The Hull


Bottom Paint!


This is the first coat of bottom paint on the hull. Hopefully it will save some scuba diving scraping time!


Hailing Port and Name

The vessel name is required to be marked on the bow for documented vessels. The name and hailing port is also required to be marked on the stern The bow markings were already on the boat so we added the stern markings and painted them. Other than the bottom paint, this is the only paint on the boat exterior. There is almost no maintenance required on the hull and deck!

Bicycle Cart
This is a bicycle cart we made for getting supplies. The cart folds and the wheels can be removed.

port and starboard side. An additional cleat was placed on the center stern. We also constructed the two seats on the aft cabin. There are two line spools under the seats that hold 250' of 3/4" nylon line which are attached to two emergency anchors. There is an access cap next to the aft most cleat that provides additional spooled line from below. Additionally, we added flood lights on the port and starboard sides.
The Aft deck had an H-Bit and nothing else. We loved the H-Bit but it was taking up too much space. The H-bit was cut off and replaced with two cleats on the


Aft Deck Modifications

This is a windvane we made for an auxiliary rudder.

We installed a new compass!
bottom of page